
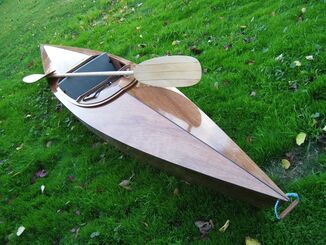
Stitch and Glue Laker

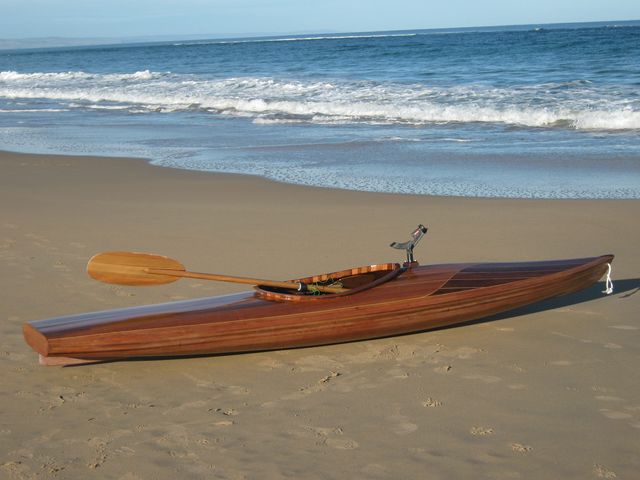
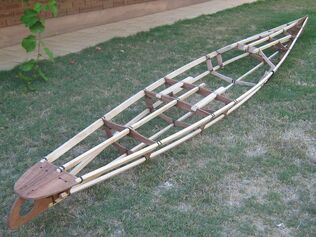
Skin on Frame Curlew
Comparison of 3 kayak construction methods.
There is a considerable amount of information on home building kayaks in the Wiki already so this is specifically about my experience building kayaks by 3 different methods – stitch and glue (S&G), cedar strip and skin on frame (SOF). Note that none of the designs I built are SOT.
There are other build methods such as lapstrake and fibreglass but this write up is just about the 3 I have tried.
Also included are comments about local factors, particularly available materials, and a variation on the S&G technique.
I found that there are pros and cons for each method both in terms of the building process and in the final product.
The comparison table summarises the differences and similarities of each aspect but I have also developed a personal preference for a construction type based on my own views and needs and also influenced by what is most readily available in terms of materials.
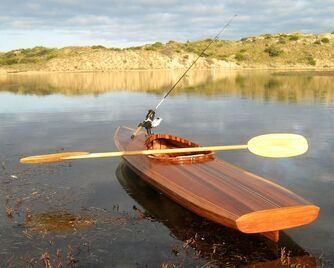
Cedar Strip - Own design
In the comparison table I have described ease of build using only ratings of "Easy" or "Not hard". This is because each individual part of the process is not difficult even though the entire build may be lengthy.
As far as cost goes I don’t think there is a lot of difference – they are all going to be well under $1000 so are good value for a custom boat.
Weight wise I’ve found some difference but not much. Stitch and glue will tend to be slightly heavier than the others but the final weight really comes down to a number of factors including intended use, builder experience and available materials. My kayaks range from about 14.5kg to 15.5kg.
The important difference is in the practical side but appearance can be a factor for some people.
While any method can produ

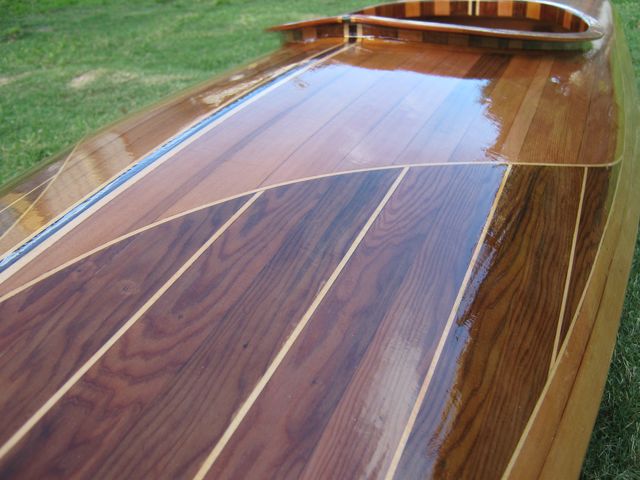
Deck of strip built kayak
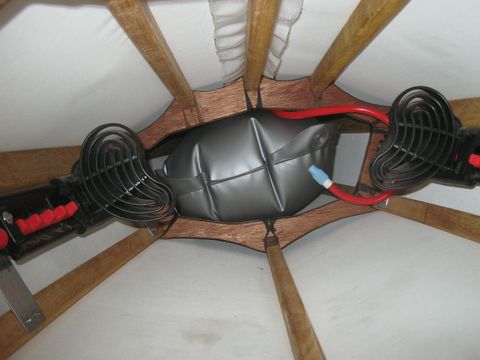
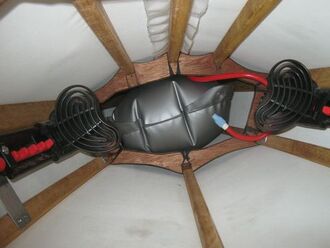
ce a capable boat for all sorts of conditions there is one particular disadvantage of the SOF that I would prefer not to put up with and that is the inability to install bulkheads. Of course this is technically incorrect as you could install a bulkhead of sorts - but it would need to be flexible or it would put a ridge in the hull that would increase drag and create a wear area. It would be very difficult to make a flexible one strong enough to hold back the water after a wet exit and it would also somehow have to seal around the frame stringers. So from the practical viewpoint it is necessary to use float bags if you want to safely go any reasonable distance from the shoreline.
Float bags are able to reduce the amount of water in the hull in the event of a capsize but there is always the need to pull them out to dry the hull after use to prevent rot/mould, then reinstall them for the next outing. Mine cost $75 and these were in the budget range of what is readily available. Some people are happy with this but I prefer the bulkhead option.
Interior of SOF showing float bag and footpegs
Other advantages of bulkheads apart from buoyancy are that they provide dry storage and it is easy to open a hatch to ensure dryness between trips. So for me this boils my preference down to a choice between stitch and glue or timber strip.
Stitch and glue can make some good hulls and there are a number of designers offering multichine design plans and kits. If you want to design your own there is software available but I believe it is more difficult to learn than the one I used for the strip build. I have not used any of the other programs but from discussions on other forums I have this impression. There is also the question of materials and I seem to have developed a mild aversion to plywood. This is due to a combination of the difficulty in obtaining good ply at a reasonable price in this country, the tendency for splintery edges, the apparent waste and the need to handle large panels in the initial stages.
Still, if you want a good solid hull with minimal work this is the way to go.
A relatively recent development in S&G is known as SS&G, short for strip, stitch and glue. This involves using timber strips glued together to make panels which are then used as ply would be for a S&G design. In Australia we are blessed with plantation grown paulownia which is even lighter than western red cedar with similar strength and if I ever do another S&G design this will be what I use. From what I have seen it looks like it would be cheaper than using high quality marine ply too. I’m hoping someone out there will do a Jem Sabalo in paulownia one day as I reckon it would be an amazingly light fishing SOT if the right timber thickness and glass weight were used.
Overall my preference is for cedar strip. From an appearance viewpoint they can be the best for both the shape and the timber colour/patterns but this really is a personal thing and a good paint job can be impressive on any type of hull. Any advantage of strip building comes at a cost of greater labour – 2 or 3 times the duration of the other methods - but some of us like that kind of thing and I much prefer working with solid timber than with ply. A combination of colour contrasting paulownia and western red cedar can be used to make some simple but impressive patterns and this can be further enhanced by small amounts of denser timbers for other contrasts. Of course this can also be done in SS&G.
I believe that a slightly lighter hull is achievable with strip building and it enables creation of true compound curves, giving slightly better rigidity and potentially a more efficient hull. The software also enables a high degree of customisation with good predictions for drag and stability. The software I used for the strip build is called Kayak Foundry and is easy to start using. I really enjoyed the design stage but be careful if you try it because as you progress you will find that there is much more to kayak design than learning the software.
For those that do not want to design their own there are good plans available for all types. Kits are also out there for S&G and SOF but I am not sure about strip building.
Each build has been a positive and educational experience and resulted in a good kayak, although they are all good at different things, and I’m looking forward to some more strip builds – when I get my shed back.
Apart from construction method my kayaks are also all very different in design. Here is a brief comparison of the designs.

Laker 13’ long by 26” beam – good for flat water fishing, photography and light touring. Open cockpit design makes fishing easy. A good amount of usable cargo volume for a smallish kayak. Will handle a bit of chop but not recommended for the sea.

Curlew 15’ long by 24” beam – good for faster cruising, light fishing, photography. Not a lot of usable cargo volume or cockpit space. For fishing take minimal gear and be prepared for

little catch storage space.
Cedar strip own design 11’ long by 24” beam – very stable - good for inshore fishing and photography and will handle rough conditions. Too short for covering long distances. Small cockpit opening to allow use of spraydeck going through surf zone. Again, minimal fishing gear and a couple of reasonable size snapper would occupy most of the catch storage space.
Comparison Table[]
| Stitch and glue | Wood Strip |
SOF - ply frame | |
|---|---|---|---|
| Ease of build | Easy | Not hard | Not hard |
| Build time | Medium (50 - 100 hours) | Long (200+ hours) | Short (40 - 80 Hours?) |
| Appearance | OK | Good |
OK |
| Designs . | Hard chine | Rounded | Hard chine |
| Designing own | Need software for panels - can be 2 stage | Kayak Foundry (free - but good) | Need software for panels - can be 2 stage |
| Ruggedness | Tough enough | Tough enough | OK - more risk of puncture. |
| Flotation | Built in bulkheads | Built in bulkheads | Float bags needed |
| Storage | Dry compartments with bulkheads | Dry compartments with bulkheads | Drybags needed |
| Weight | OK with light glass and good ply. Possibly better with SSG. | Good (esp with Paulownia and light glass) | Good - with light timber type and skin weight |
| Normal Maintenance | Varnish at 3 - 5 years. Patch wear spots as required | Varnish at 3 - 5 years. Patch wear spots as required | Patch and paint as required. Reskin at ~10 years? |
| Repair | Easy, but appearance may be affected. | Easy, but appearance may be affected. | Doable but likely not as easy as others. |
| Main materials |
Ply Glass cloth Epoxy Fillers (can use sawdust/wood flour) Varnish |
Timber strips or boards Glass cloth |
Timber - stringers Ply - frames |
| Processes | Marking out and cutting wood Shaping (plane, rasp, abrasives) Drilling Gluing and filling Fibreglassing Varnishing Sanding |
Marking out and cutting wood Shaping (plane, rasp, abrasives) Drilling Gluing and filling Fibreglassing Varnishing Sanding |
Marking out and cutting wood and fabric |
| Cost All typically in $400 to $800 range - depends on location, material quality, brands, work input etc |
|
Plans can be bought for all 3 styles and there is software available for own designs as well. |